


Complete Guide to Corrugated Flute Types: E, B, and BC Explained
Feb 17, 2026
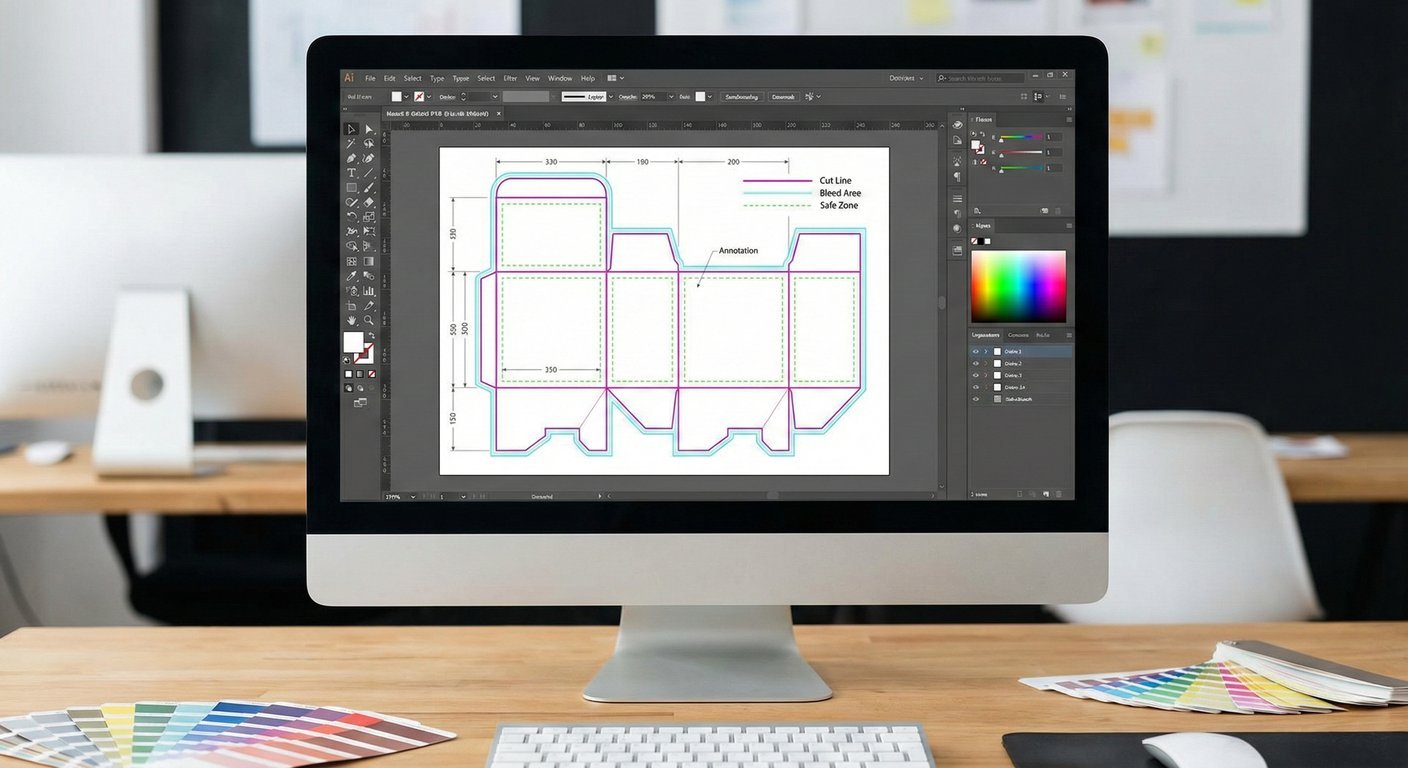
Nothing ruins a beautiful packaging design faster than unwanted white edges or text getting chopped off during production. Whether you are a seasoned graphic designer or a brand owner creating your first custom box, understanding the technical relationship between the Dieline and Bleed is non-negotiable for professional results.
To create a physical box from a digital file, we need a precise blueprint. The dieline acts as this blueprint, while the bleed acts as a safety net for the manufacturing process.
If you submit artwork without bleed, a slight shift in the cutting blade—even by a fraction of a millimeter—will reveal the white color of the paper stock. For more on how digital files translate to physical media, you can read about Vector Graphics which are essential for crisp dielines.